
Do you have clients looking to conquer a new personal challenge? The single-leg squat (also known as the pistol squat) isn't easy! Not everyone can do this exercise correctly. Those that can, have typically spent time training specifically to be able to complete the movement.
Although sometimes challenging, unilateral movements, like the single-leg squat, are great exercises to help reduce asymmetries in the body and minimize injuries. So, whether your client is focused on balancing out both sides of the body or just looking for a new way to push their limits, it's worth giving this one a try.
We will explore what the single-leg squat form looks like and some of the progressions to consider when trying to master the movement.
The Single-leg Squat (Pistol Squat)
The single-leg squat isn't a beginner exercise. Clients should have a decent level of strength, flexibility, balance, and mobility before attempting it. They should also be able to perform a proper bodyweight squat (two legs) before progressing to a single leg.
Single-leg squat form:
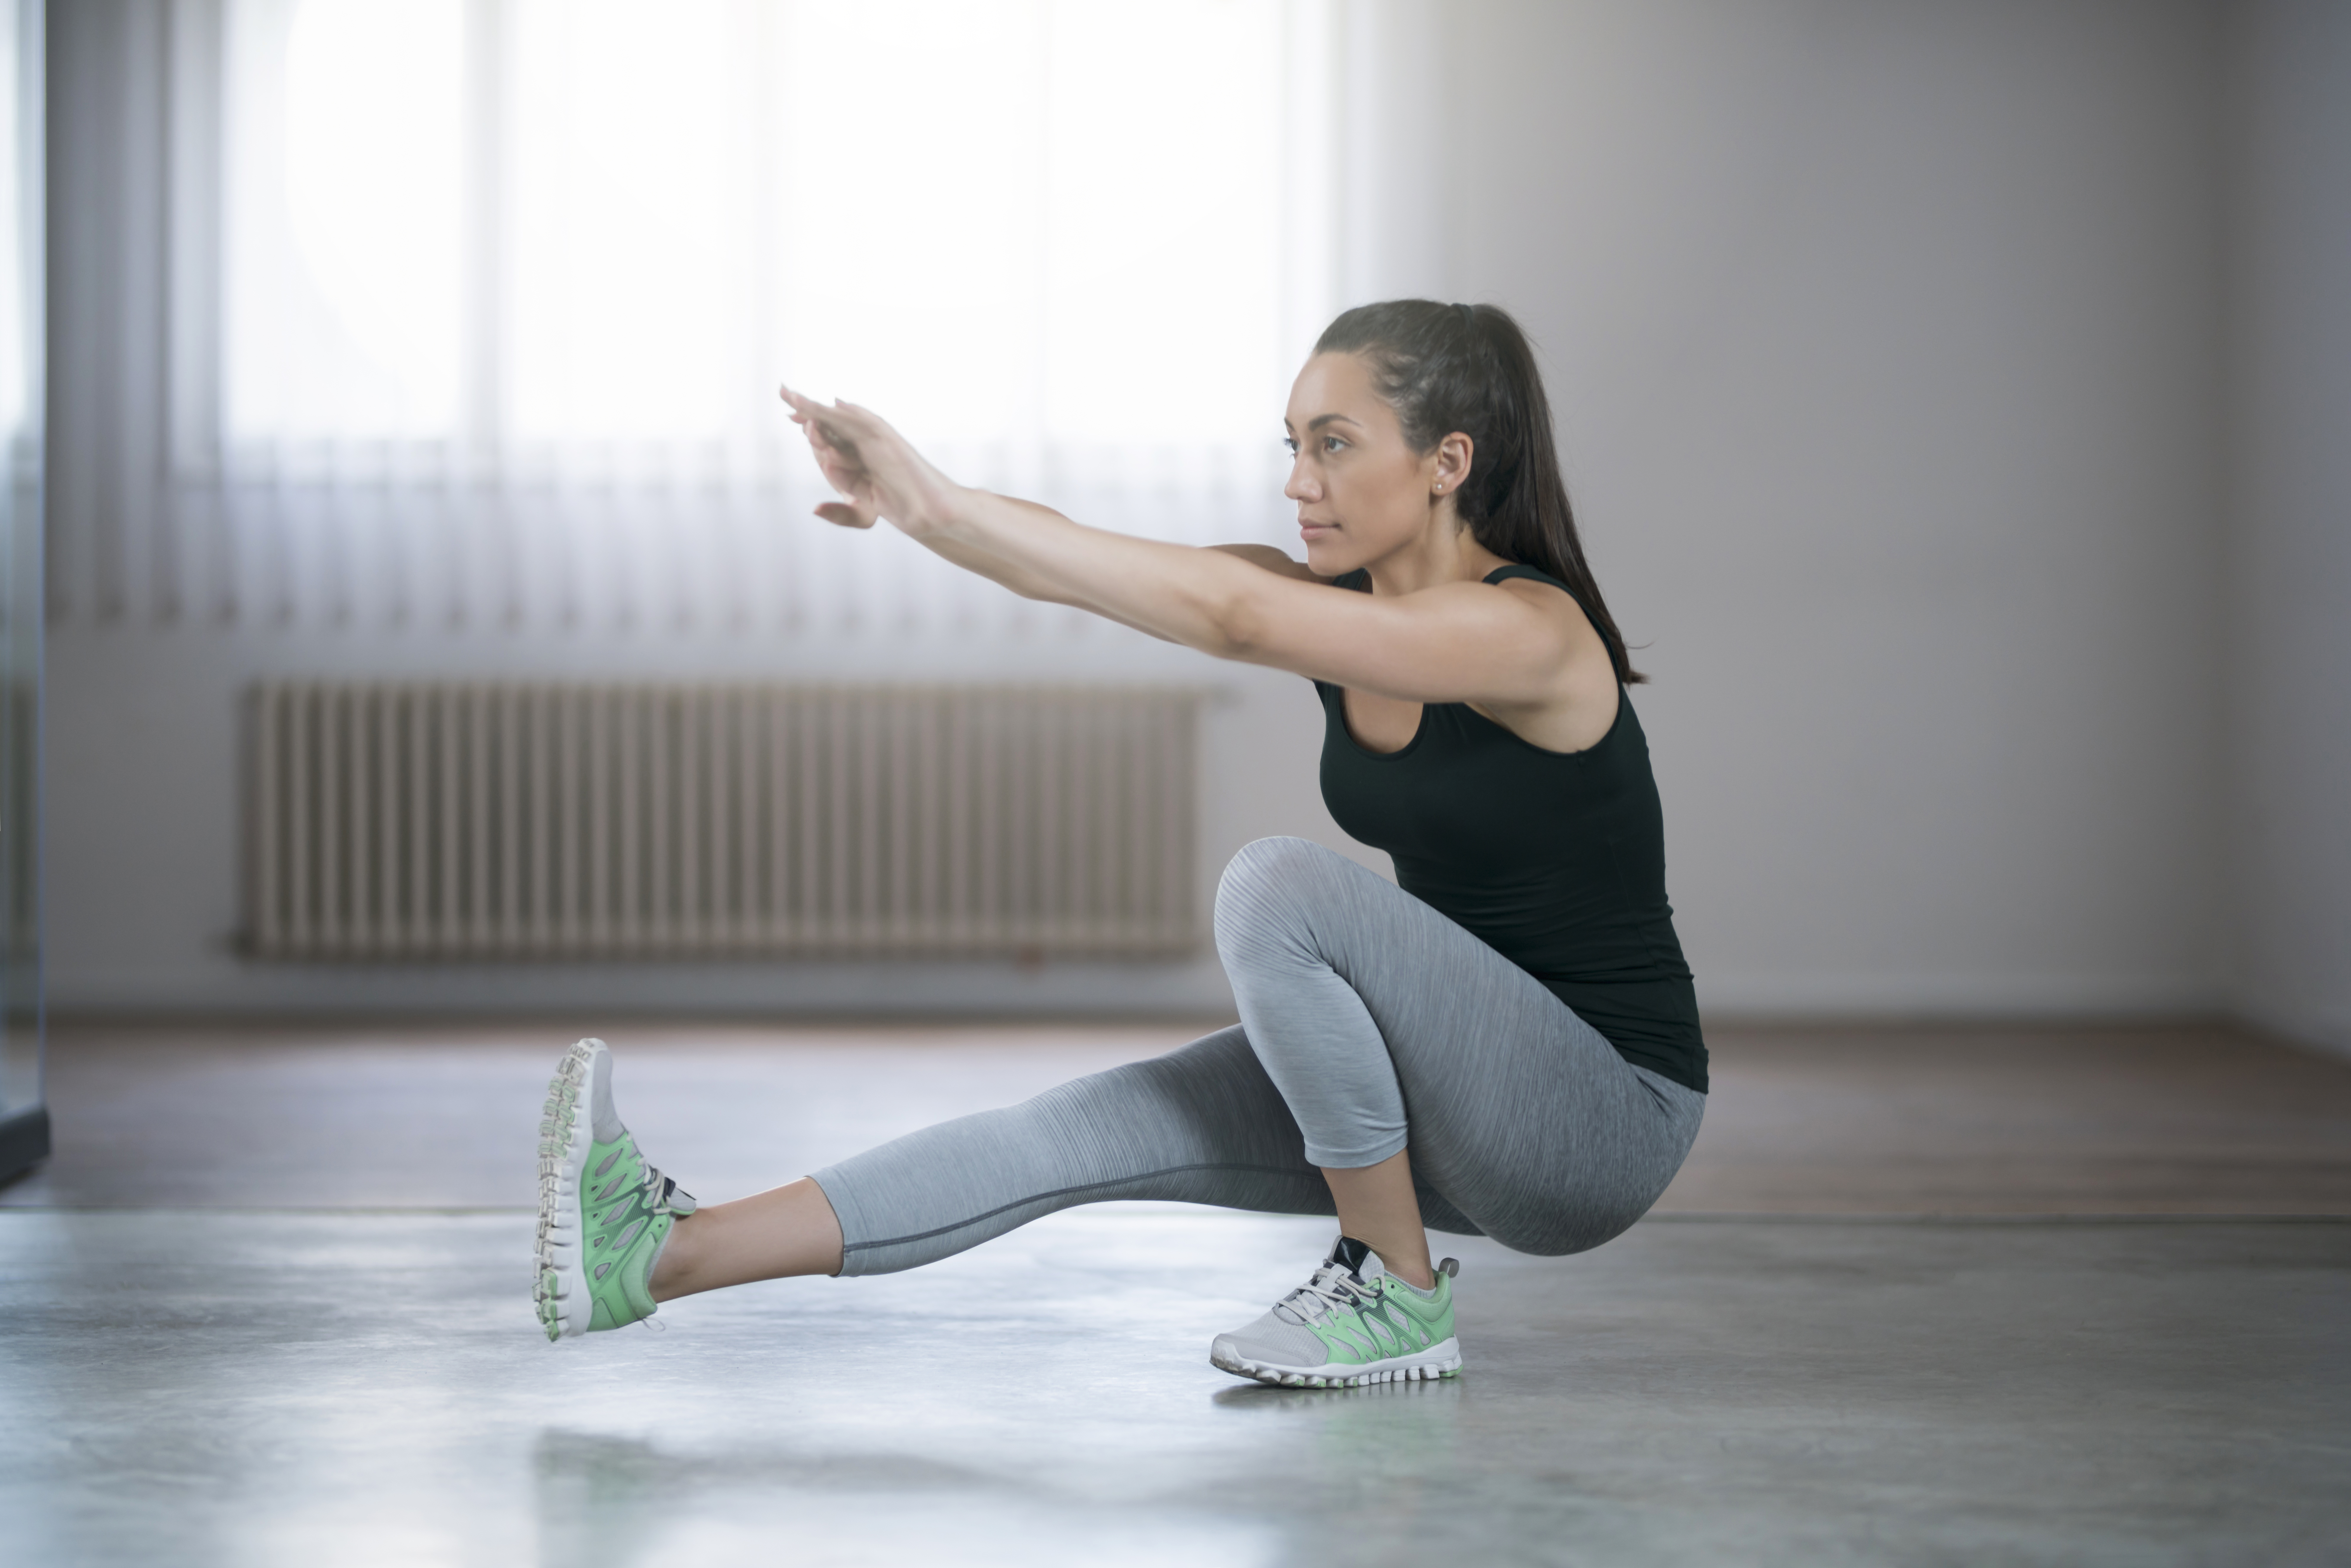
To begin, the client will shift their weight to one leg, engage their core muscles and raise the opposite leg off the floor, in front of them.
Extend both arms out straight in front of the body.
With the chin up, spine straight (torso leaning slightly forward), and the hips back, the client will slowly lower themselves into a squat.
The toes and kneecap (patella) remain pointed straight ahead throughout the entire movement.
The elevated leg does not touch the ground throughout the exercise.
The client will lower their body until the hips are close to the heel of the balancing foot.
Slow and controlled, keeping the patella pointed straight ahead and the core engaged, the client will press back up to the starting position.
Progressions for Mastering the Single-Leg Squat
Again, it's important for the client to be able to complete a proper bodyweight squat (two legs) before progressing to a single-leg movement. They should have decent hip, knee, and ankle mobility and the balance for movement on one leg. Once they have mastered a bodyweight squat, you can progress them to the exercises below.
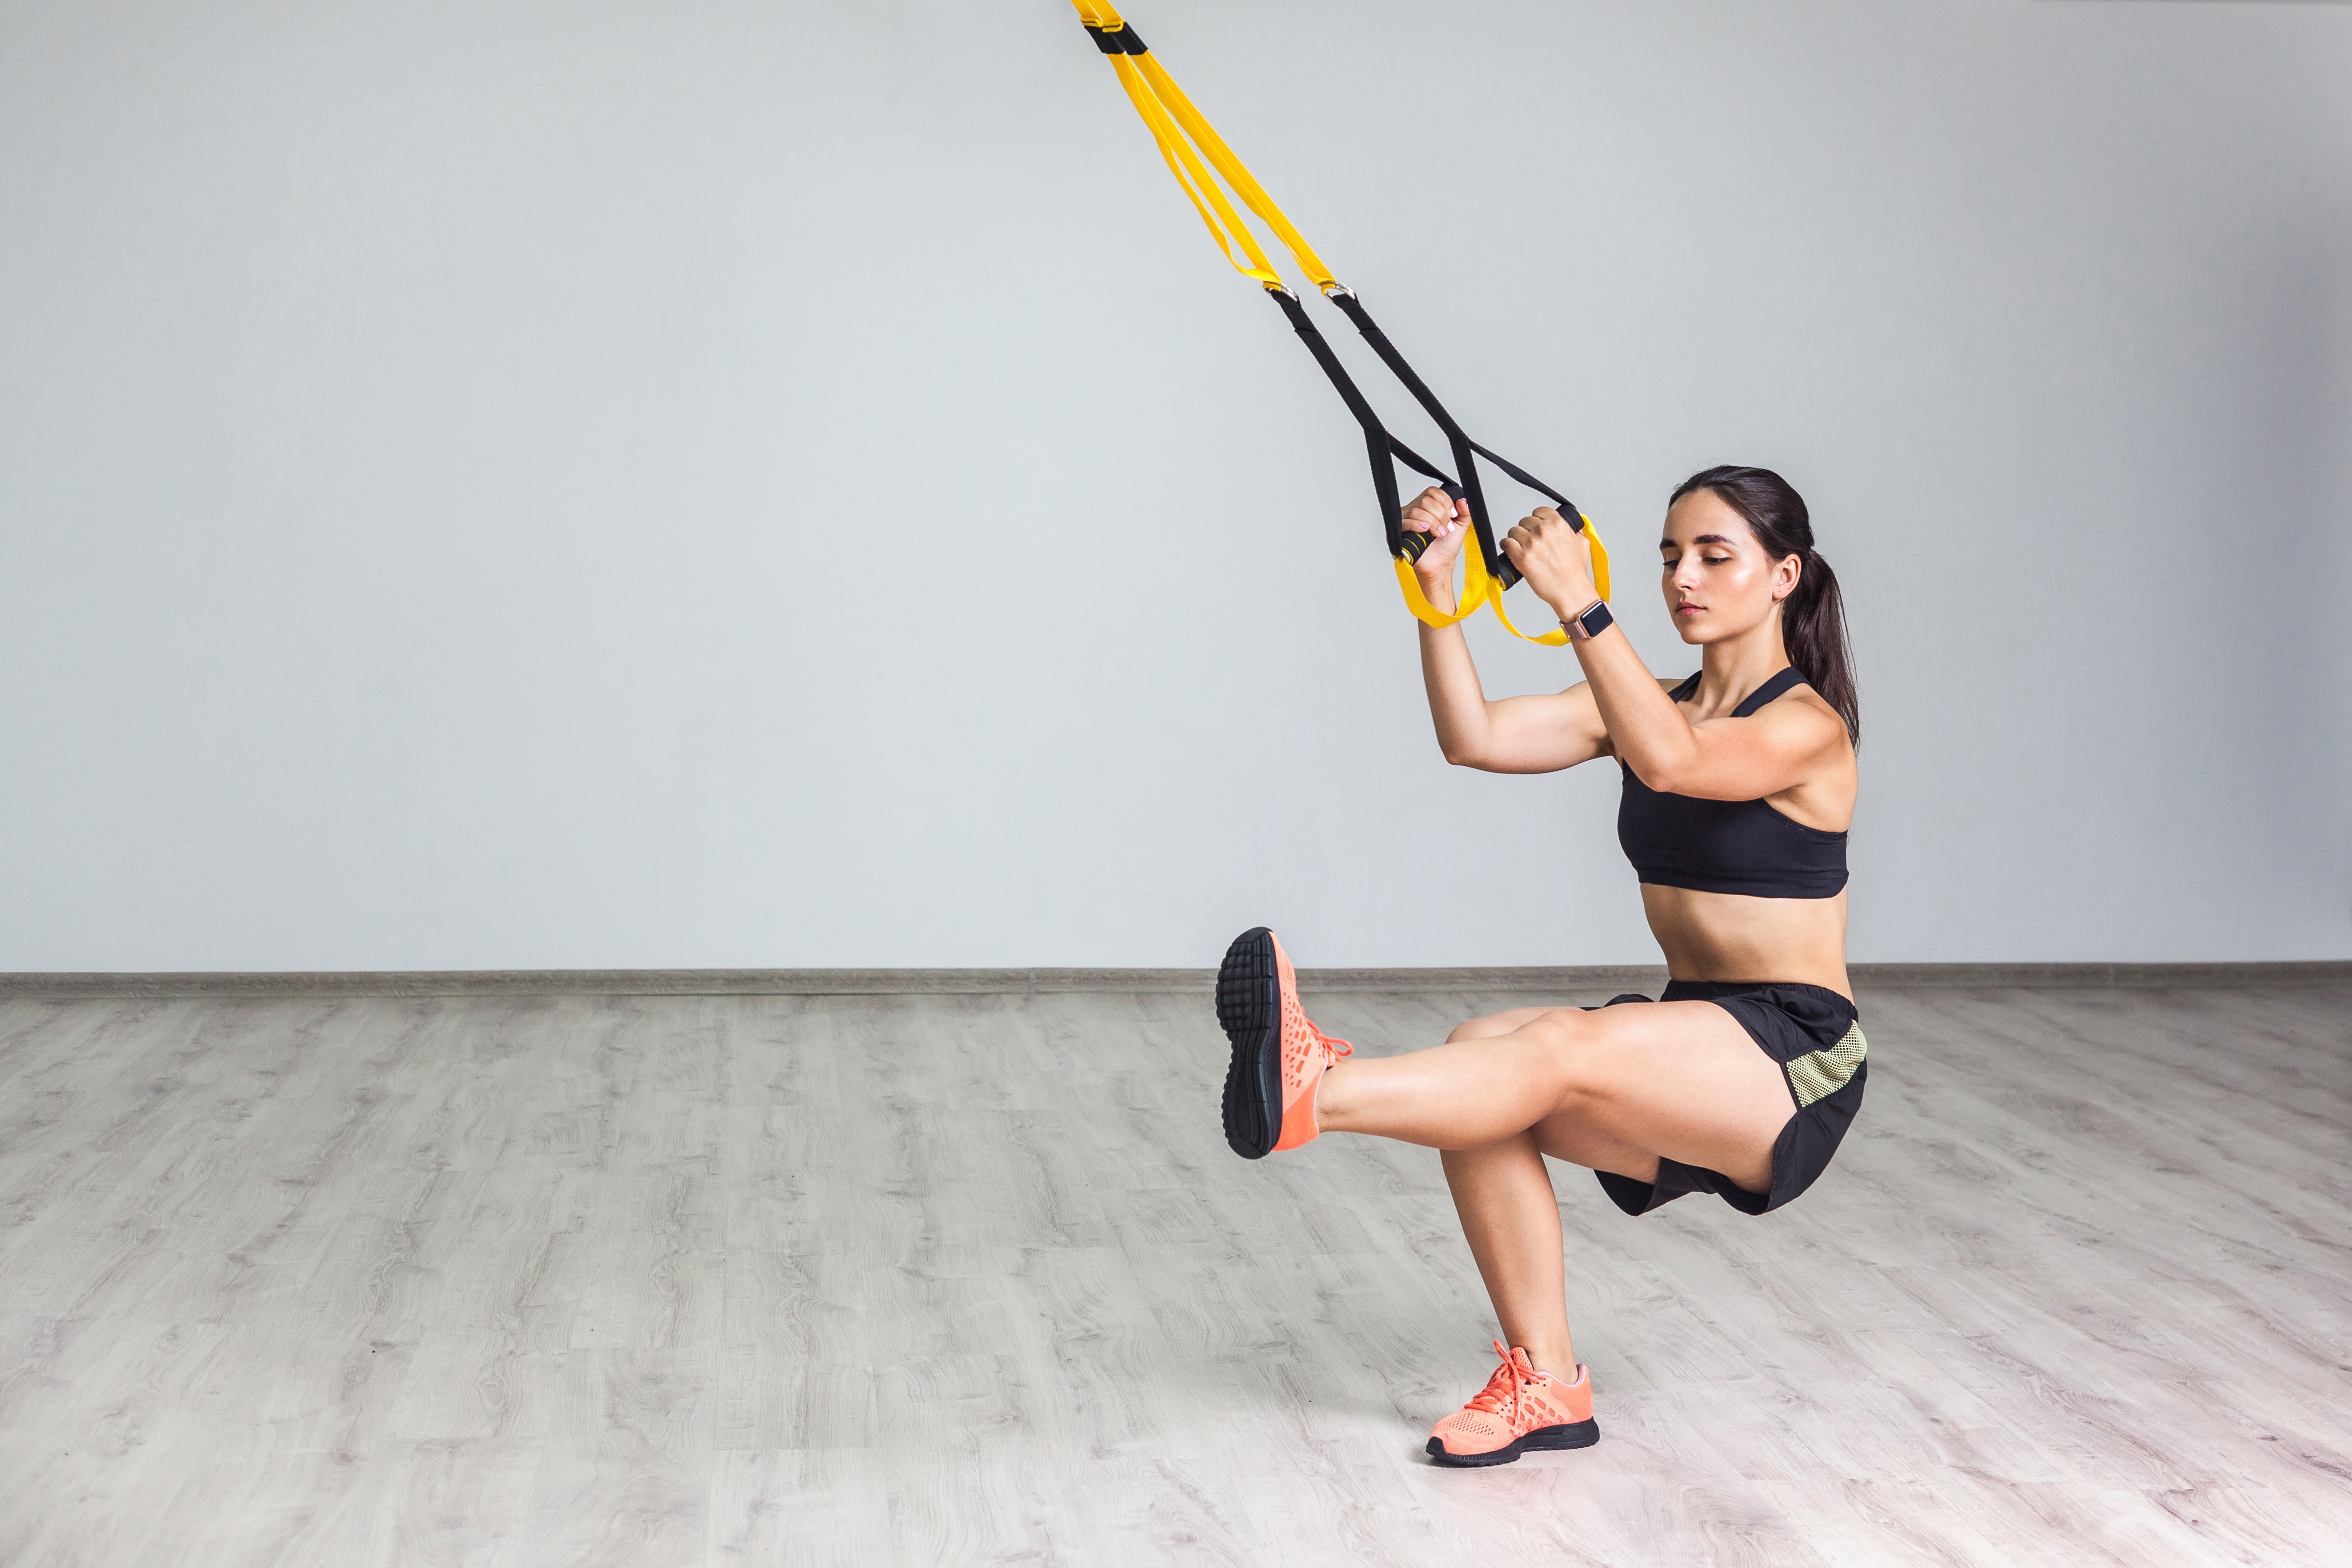
1. Assisted Single-Leg Squat
The client will perform a single-leg squat, through the full range of motion, utilizing equipment that supports their bodyweight, when needed.
Clients can use resistance bands, suspension bands, a pole, or anything else similar that is anchored in front of them and provides bodyweight support throughout the full range of motion.
The client will firmly grip the support equipment securely anchored in front of them and lift one leg off the ground.
As they are balancing on one leg, they will engage their core, keep the chin up, and hinge at the hips.
The client will slowly lower into a squat until the hips are close to the heel of the balancing foot.
Watch for knee valgus (knee starts to cave in toward the midline of the body). The patella should point straight ahead, in alignment with the toes, throughout the entire squat.
Once they've reached the bottom, they will press back up to the starting position using their leg strength.
They will hold the support equipment throughout the movement and utilize their arms to support them anytime it is needed.
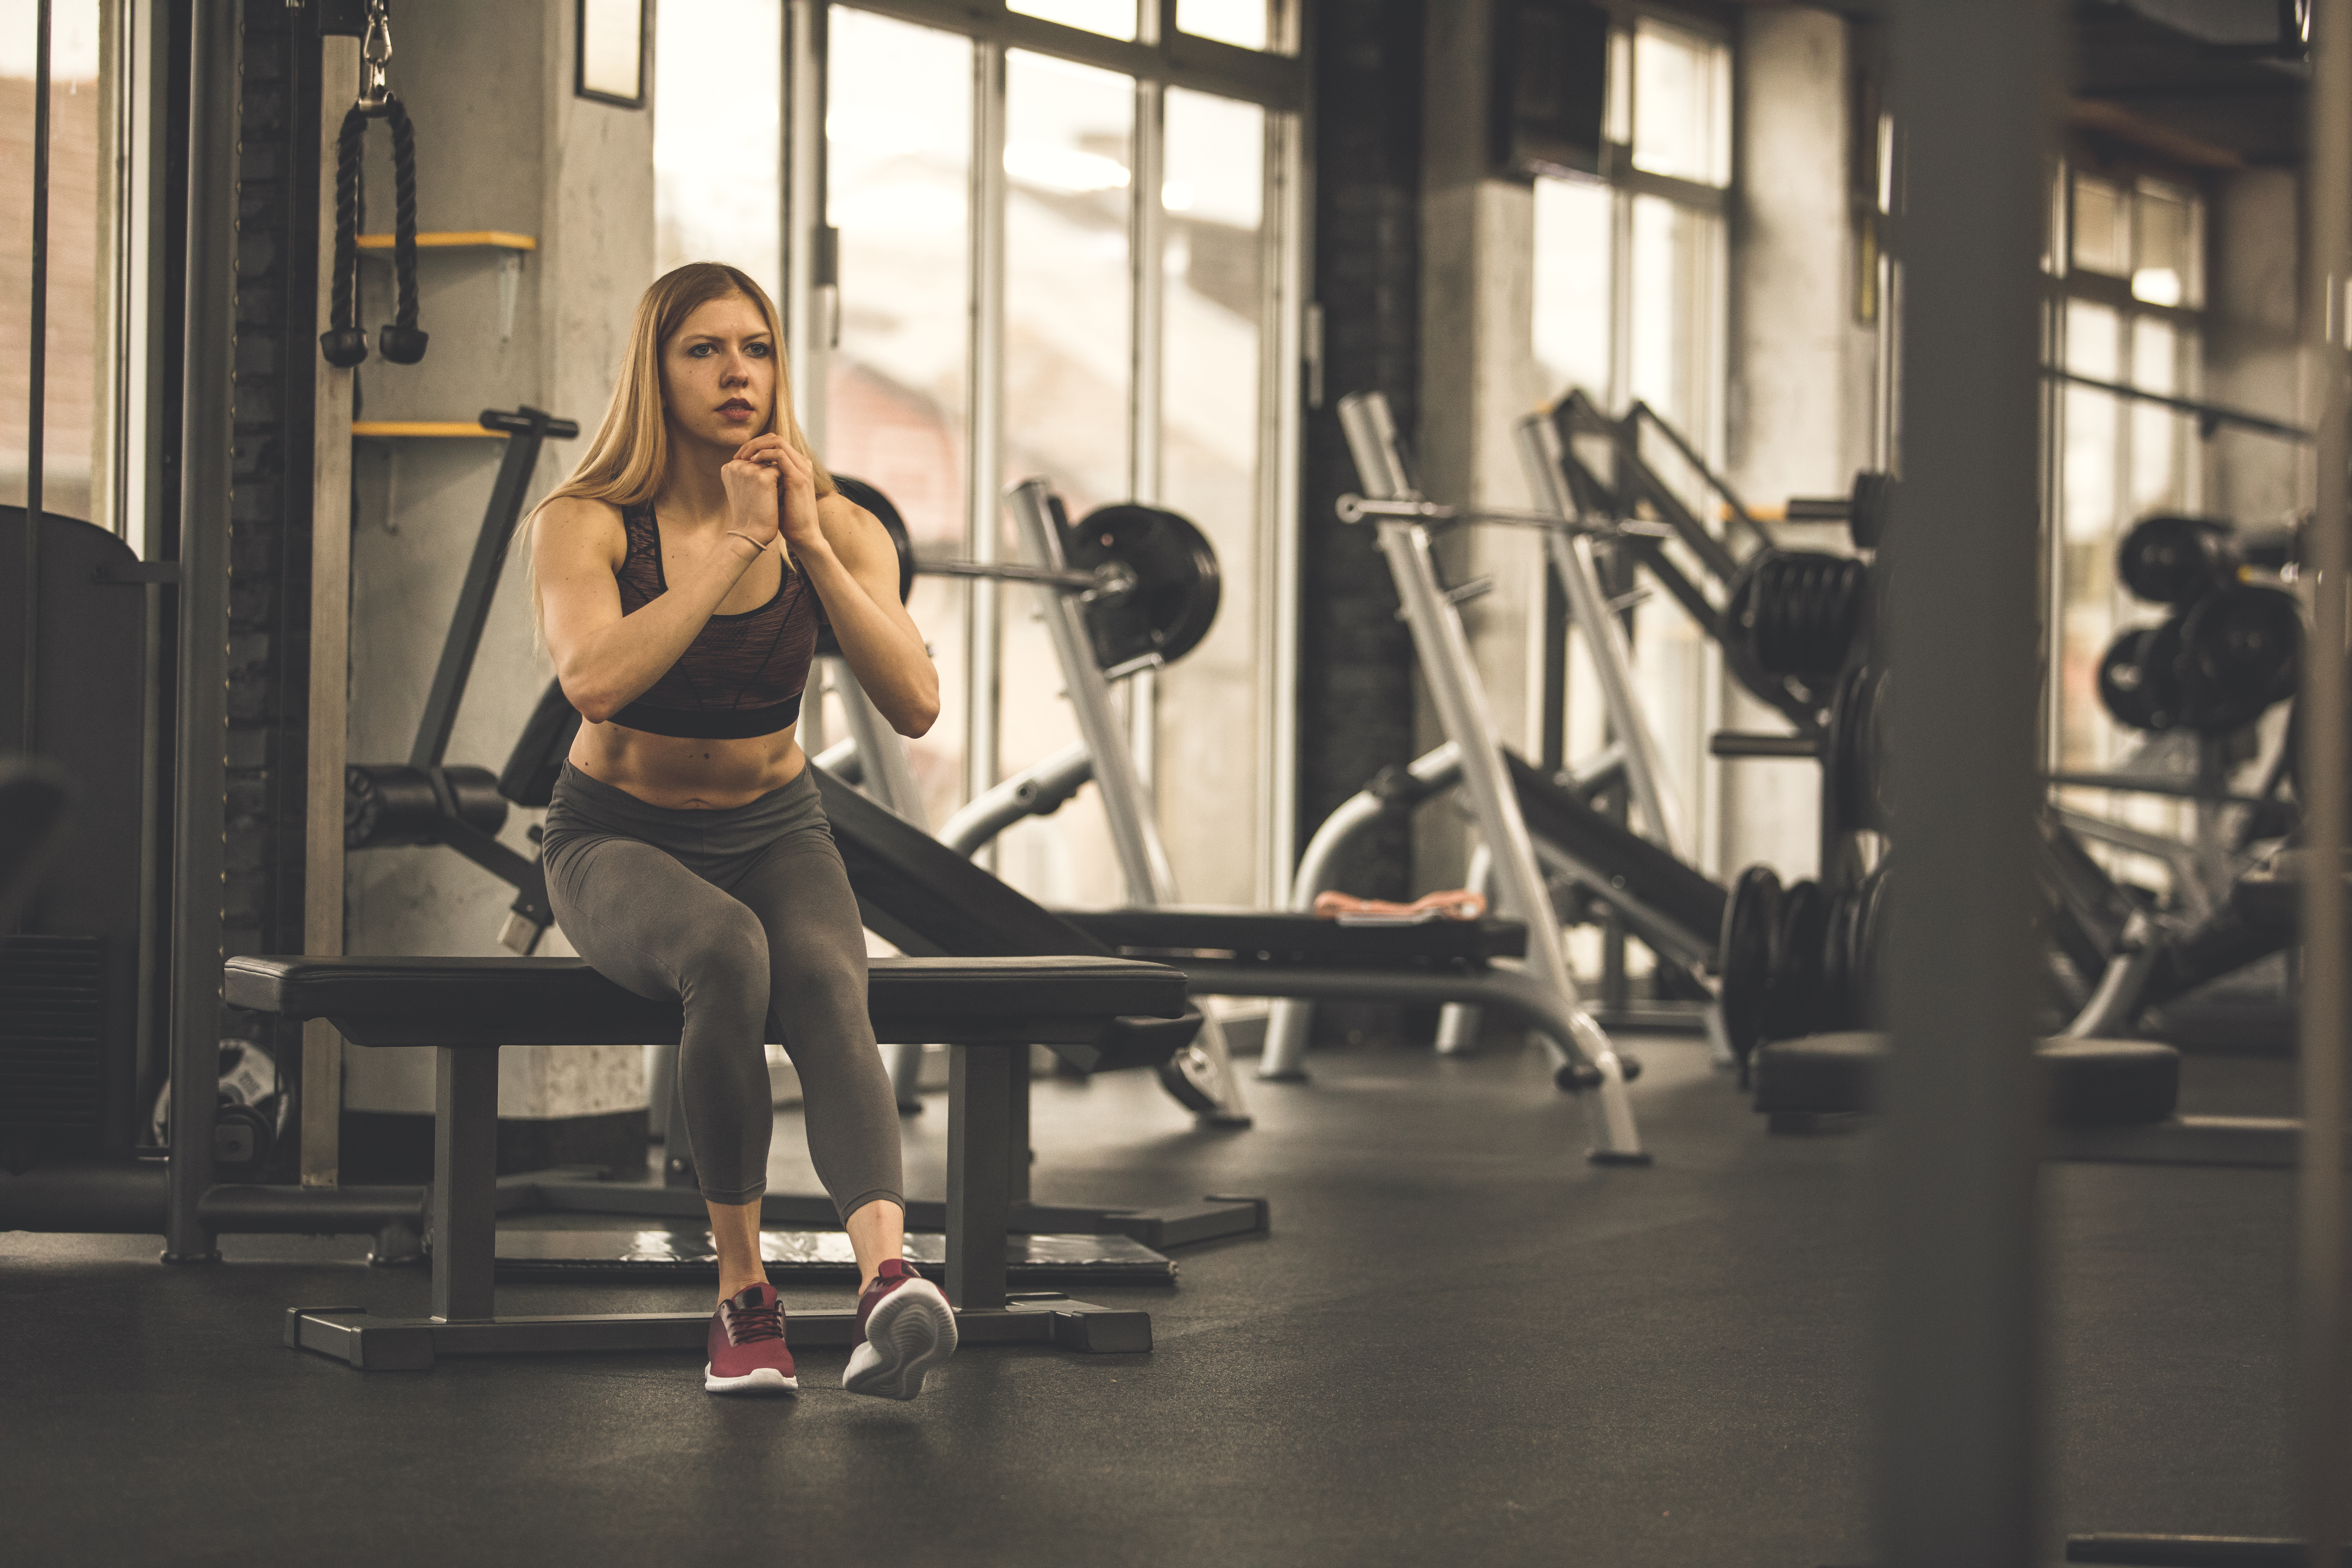
2. Partial Single-Leg Squat
For this progression, you will need to have jump boxes, benches, or chairs of a few different heights. The equipment should be stable and gradually decrease in height until reaching the lower calf/ankle height of the individual.
Beginning with the highest bench, chair, or box, the client will start by standing in front of the platform.
They will engage their core muscles, raise their arms to the front, shift their weight to one leg and raise the opposite leg in front of them.
Keeping the knee of the standing leg pointed straight ahead, they will slowly lower themselves until their glutes lightly touch the top of the platform (do not rest or sit on the platform).
Without resting or sitting on the platform, the client will slowly press back up to the starting position.
As the client progresses, replace the platform with a lower bench, box, or chair and repeat the process until the client masters the movement at each height.
The client should be able to complete several repetitions correctly before lowering the height.
Continue reducing the height of the platform until the client reaches full range of motion (full pistol squat).
3. Single-Leg Squat
Once the client has mastered full range of motion, they should be ready to remove the platform and perform a full range pistol squat without any support.
Tips for Success
The following list includes a few pointers to help your clients master this move:
Movements should be slow and controlled throughout the entire exercise!
If the knee caves (knee valgus) during the movement, you will want to incorporate exercises that strengthen the glute muscles to help hold that knee in position during the single-leg squat.
If a client has knee or ankle issues, you may want to consider a different unilateral exercise or ensure they have medical clearance from a medical professional.
To help perform the full range of motion, focus on ankle mobility (ankle dorsiflexion)
Perform several repetitions properly before progressing.
Do not bounce at the bottom of the squat. Use control and strength to rise back up!
Don't forget to breathe.
Proper form is IMPORTANT!
The arms out in front of the body help counterbalance the body weight.
Don't forget to do the exercises on both sides.
Want to make it harder? Add weight!
It won't be easy. It will take time. But, it will be worth it. Aside from being the envy of everyone in the gym, accomplishing personal challenges with commitment, work, and resiliency is a huge part of life. Mastering this exercise will put your clients in an elite group of people. Good luck!
Need to build up strength in other areas to support your squats? Check out these ISSA blogs:
Are you passionate about helping others reach their potential? Learn how to individualize and progress each client towards their health and fitness goals with ISSA's Personal Trainer Certification course! Get started today!


